Opening a can of food might seem like a straightforward kitchen task, yet for many, it can be a bit of a puzzle. It’s a common experience, you know, to stand there with a can and a manual opener, wondering if you are doing it the correct way. This simple kitchen tool, a manual can opener, is truly a necessity for so many homes, but getting it to work just right sometimes takes a little bit of getting used to.
A lot of folks, apparently, have been using their handheld can openers by trying to poke holes in the side of the can, which, to be honest, isn't the best method. This approach often leaves behind jagged, sharp edges on the lid, which can be quite a hazard in any kitchen. There is, however, a much smoother and safer way to get those cans open, and it is fairly easy to learn, too.
This article will show you the proper steps to open a can without any fuss or dangerous bits. We will walk through the process, from positioning the tool on the can to taking off the lid, so you can handle any canned goods with confidence. Learning how to use a can opener the right way can really save you time and help prevent spills or little accidents, which is pretty useful.
Table of Contents
- Understanding Your Can Opener
- The Right Way to Start: Opening a Can
- Making the Cut: Turning the Handle
- Taking Off the Lid Safely
- Common Can Opener Challenges and Solutions
- Good Tips for Using Your Can Opener
- Keeping Your Can Opener in Good Shape
- Frequently Asked Questions About Can Openers
Understanding Your Can Opener
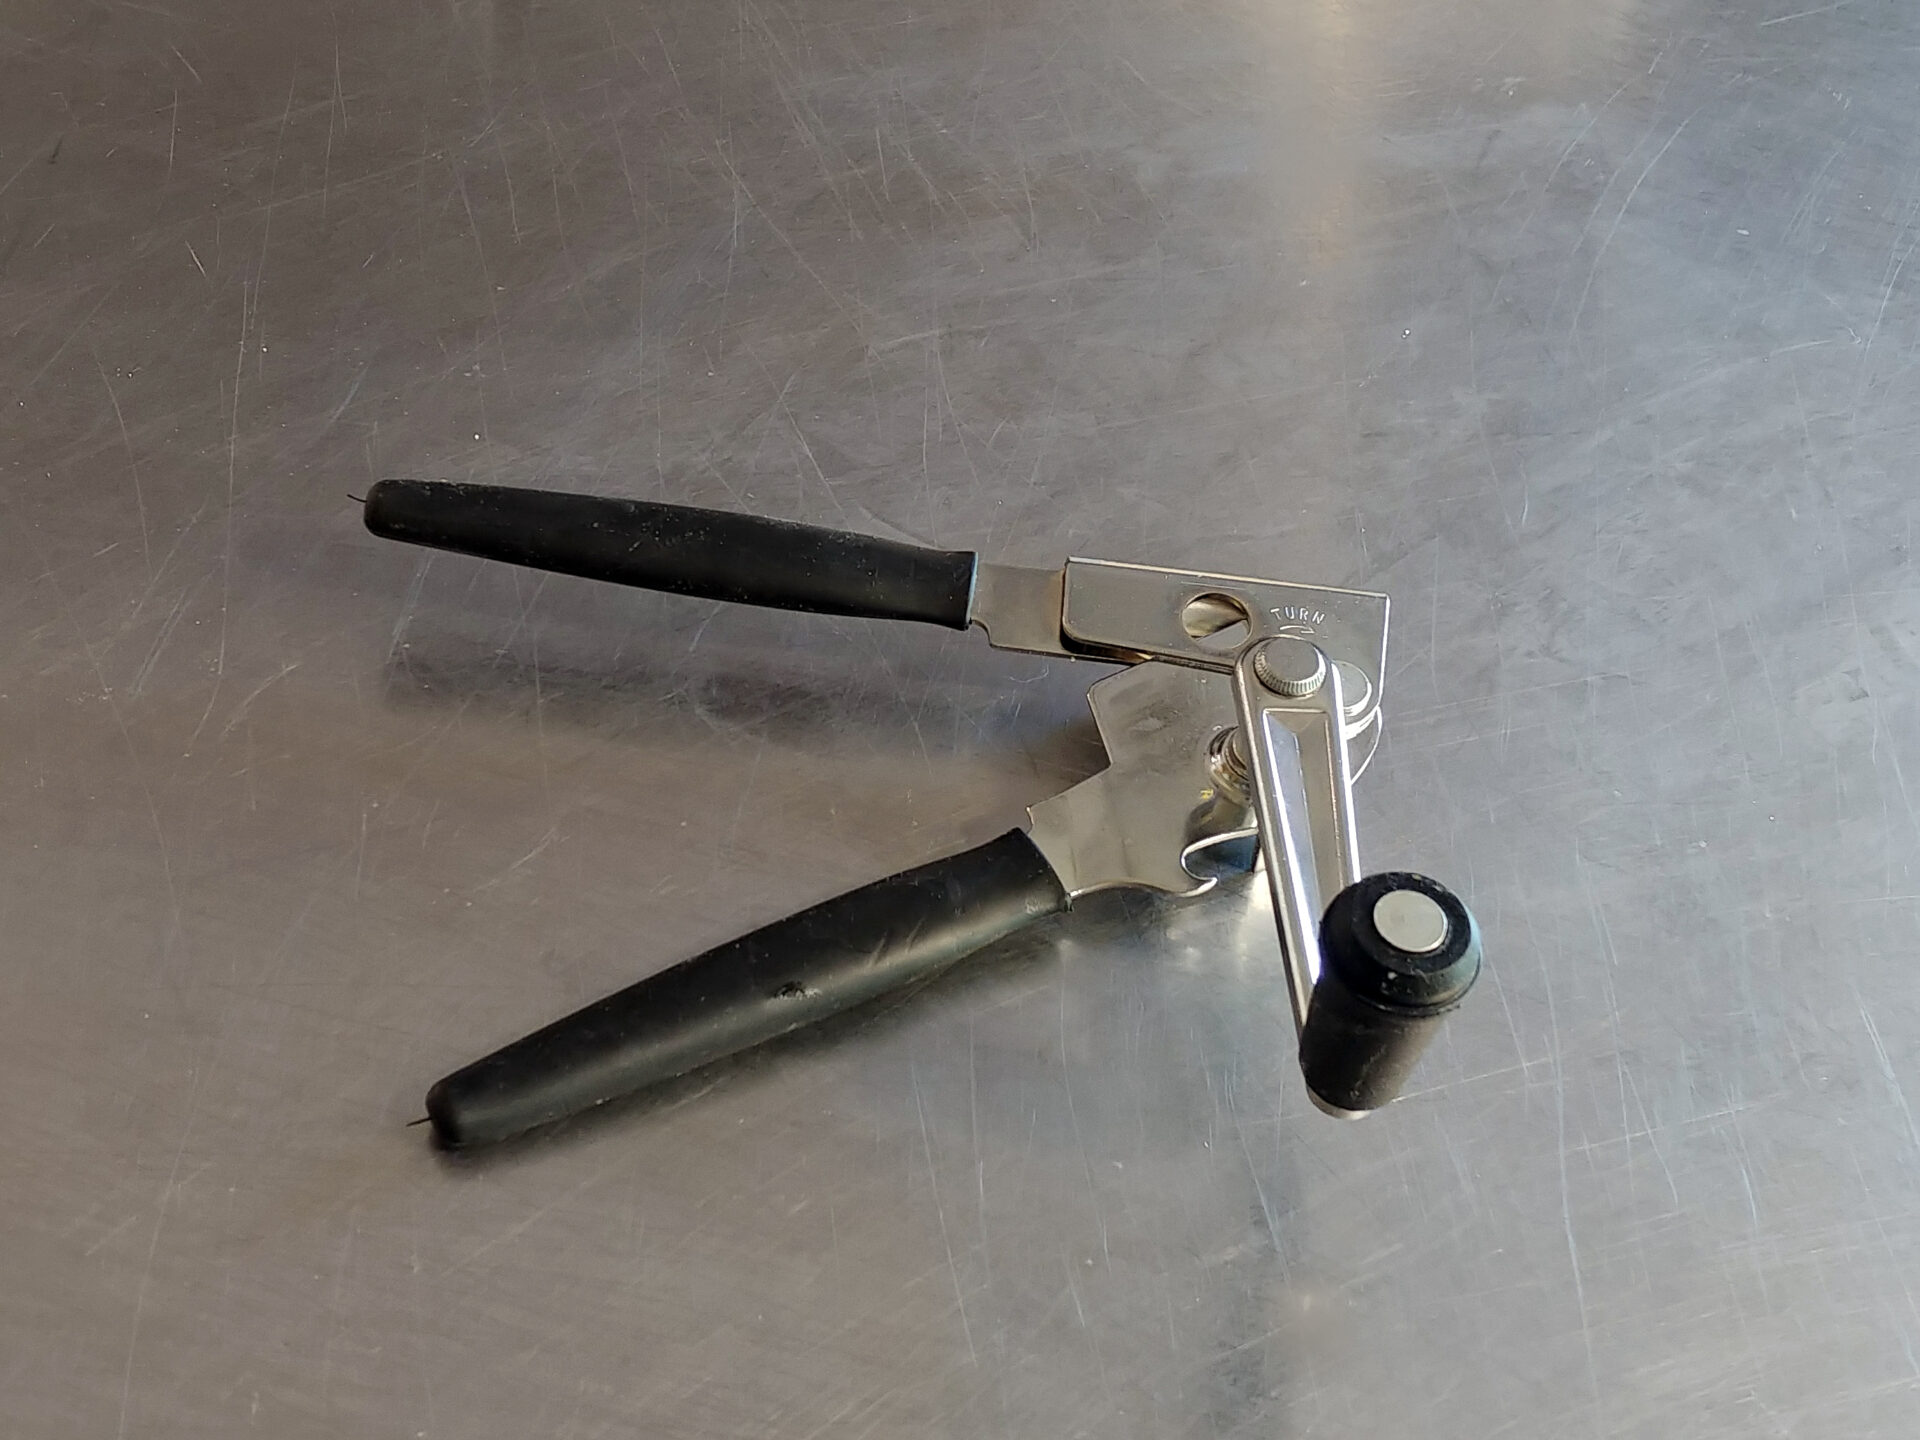
Before we get into the steps, it helps to know a bit about the tool itself. A manual can opener, you know, usually has two handles that you squeeze together. Between these handles, there is a cutting wheel and a gear or a small metal tooth. The cutting wheel is the part that does the actual slicing, while the gear helps it move around the can's edge. This design, in a way, allows the opener to grip the can and make a clean cut.
The meaning of "use" here, as my text puts it, is to put this tool into action for a specific purpose, which is to open a can. It is about employing the can opener for its intended job. Knowing what each part does, honestly, makes it simpler to put the tool to work effectively. Many people might not think about the parts, but they all work together to get the job done, so it's good to know.
Some can openers might look a little different, with some having a magnet to hold the lid or a bottle opener on the side. But the core parts, the cutting wheel and the gripping gear, are nearly always there. Even if you have one of the best can openers, or perhaps encounter a totally unfamiliar one at a friend’s house, the basic idea of how it works is the same, which is rather helpful.
The Right Way to Start: Opening a Can
To use a can opener properly, you first need to get it onto the can in the right spot. This is, arguably, the most important step for a smooth opening. You want to place the opener on top of the can, not on the side where you might try to poke a hole. The cutting wheel needs to sit just inside the can's rim, and the gear should be on the outside, gripping the top edge.
You then gently squeeze the handles of the can opener together. This action, you see, makes the cutting wheel press down onto the can's lid while the gear holds the can's rim firmly. You should feel it sort of "lock" into place. If it feels wobbly or like it might slip, then it is not positioned correctly, so try again.
The goal here is to make sure the opener is aligned with the can’s rim, so the cutting wheel can start its path around the top edge. This method helps to ensure that when you cut, the lid comes off cleanly, without those sharp, dangerous edges. It is a simple process, really, but getting this first step right makes all the difference, you know.
Making the Cut: Turning the Handle
Once your can opener is securely attached to the can, the next step is to turn the handle. Most manual can openers have a small crank or knob that you turn. You will want to turn this handle clockwise, which means turning it to the right, in the same direction a clock's hands move. This action, basically, makes the cutting wheel travel around the can's rim, slicing through the metal lid.
As you turn the handle, you should feel a slight resistance as the cutting wheel does its work. Keep turning the handle steadily, applying just enough pressure to keep the opener moving. You will notice the can spinning as the opener goes around it. This is normal and means it is doing its job, pretty much.
Continue turning the handle until you have gone all the way around the can. You will usually feel a change in resistance or hear a slight click when the cutting wheel has completed its full circle. This means the lid is now detached from the can, or nearly so, which is good. It is a continuous motion, you know, and consistency helps a lot here.
Taking Off the Lid Safely
After you have turned the handle all the way around the can, the lid should be mostly separated. To remove the lid, first, stop turning the handle. Then, you can gently loosen your grip on the can opener's handles. The can opener, in a way, might still be attached to the lid, which is fine.
Carefully lift the can opener straight up, and the lid should come with it. Many modern can openers are designed to hold onto the lid after cutting, which is a nice feature that helps keep your fingers away from any potentially sharp edges. If your opener does not do this, you can use the opener itself to lift the lid slightly, then use a spoon or fork to pry it off completely, just be careful.
The goal, as my text mentions, is to open the can so there are no sharp edges on the lid. This method of cutting around the top rim, rather than puncturing the side, significantly reduces the risk of cuts. It is a much safer way to get to your food, honestly, and something everyone should know for kitchen safety.
Common Can Opener Challenges and Solutions
Sometimes, a can opener might not seem to work right, and that can be a little frustrating. One common issue is when the opener slips off the can. This often happens if the opener isn't clamped on tight enough or if it wasn't positioned correctly to begin with. The solution, typically, is to reposition it carefully, making sure the cutting wheel is inside the rim and the gear is gripping the outside edge firmly, you know.
Another challenge is when the can opener cuts only part of the way around the can. This might mean the cutting wheel is dull, or perhaps you didn't apply enough steady pressure while turning the handle. You can try going over the uncut section again, applying a bit more consistent pressure. Sometimes, a very old or worn-out can opener just needs to be replaced, which is fair enough.
If you find that the lid has sharp edges even after using the correct method, it could be that the cutting wheel is damaged or very dull. A dull blade can tear the metal rather than cut it cleanly. For really stubborn cans, or if your can opener is just not doing its job well, it might be time to get a new one. A good, sharp can opener makes the whole process so much easier, so it's worth it.
Good Tips for Using Your Can Opener
For a truly smooth experience, there are a few extra things you can do. Always make sure your can opener is clean before you use it. Food bits or grease can make it slip, or even make the cutting action less effective. A quick rinse or wipe after each use, you know, helps keep it ready for next time, and that's just good practice.
When you are turning the handle, try to keep the can on a flat, steady surface. Holding the can firmly with one hand while you operate the opener with the other provides stability. This stability, in some respects, helps prevent the can from wobbling, which could cause the opener to slip or make an uneven cut. It is just a little thing that makes a big difference, apparently.
If you are opening a very large can, you might need to adjust your grip a little as you go around. Sometimes, for instance, you might need to briefly stop, adjust your hand position, and then continue turning. The word "use" refers to employing something for a particular purpose, and here, it means adapting your hold to make the tool work best for the size of the can. This versatility allows it to fit into various contexts, like different can sizes, which is handy.
Keeping Your Can Opener in Good Shape
To make sure your can opener lasts a long time and works well every time, a little care goes a long way. After each use, it is a good idea to wash your can opener with warm, soapy water. This helps remove any food particles that might get stuck in the gears or on the cutting wheel. Bits of food, you know, can build up and make the opener less effective over time.
After washing, make sure to dry your can opener completely. Leaving it wet can lead to rust, especially on the metal parts like the cutting wheel and gear. Rust can make the opener stiff and difficult to turn, and it can also make the cutting less clean. A quick towel dry, or letting it air dry completely before putting it away, is usually enough, which is pretty simple.
Store your can opener in a dry place, perhaps in a kitchen drawer where it is protected from moisture. This simple act of putting something to work, or employing a thing for a beneficial purpose, extends its life. A well-cared-for can opener is always ready for action, and it means you won't be scrambling for a replacement when you need to open that can of tuna for dinner, for example. Learn more about kitchen tools on our site, and check out this page for more cooking tips.
Frequently Asked Questions About Can Openers
Why is my can opener not working?
A can opener might not work for a few reasons, you know. It could be that it's not clamped onto the can's rim correctly, so the cutting wheel isn't pressing down enough. Sometimes, the cutting wheel itself might be dull or damaged from lots of use, or perhaps there's dried food stuck in the gears. Trying to reposition it or giving it a good clean can often fix the issue, which is good to know.
How do you use an old-fashioned can opener?
Old-fashioned can openers, or manual ones, are used by placing the cutting wheel just inside the can's top rim and the gear on the outside. You squeeze the handles to make it grip, then turn the handle clockwise to make the cutting wheel go around the can. It is a simple process, basically, that has been around for a long time, and it works pretty well.
Can you open a can with sharp edges?
While you can open a can that ends up with sharp edges, it's not the safest way, you know. The proper method for using a can opener aims to create a smooth, safe edge on the lid, greatly reducing the chance of cuts. If you do end up with sharp edges, be very careful when handling the lid and the can, perhaps using a cloth or paper towel for protection, which is a smart move.
Opening a can of food can seem simple, but understanding how to use a can opener correctly can save time and prevent spills or accidents. This guide offers clear steps and practical advice for anyone looking to get better at this common kitchen task. Remember, the act of using, or employment of, this tool properly makes all the difference for a safe and easy experience. Happy cooking!
Related Resources:


Detail Author:
- Name : Ronny Bednar
- Username : klein.beau
- Email : georgianna.oreilly@gmail.com
- Birthdate : 1971-05-28
- Address : 3233 Stanton Road West Aidaberg, MI 46472
- Phone : 346.427.4086
- Company : Kreiger-Boyle
- Job : Pressure Vessel Inspector
- Bio : Delectus doloremque facere quia harum architecto ex. Voluptatem consequatur harum enim nesciunt dolor atque dignissimos.
Socials
tiktok:
- url : https://tiktok.com/@dwaelchi
- username : dwaelchi
- bio : Cupiditate ea expedita qui. Amet reiciendis magni cumque velit provident.
- followers : 3846
- following : 2793
instagram:
- url : https://instagram.com/damaris_xx
- username : damaris_xx
- bio : Aut optio non aut laborum eum. Voluptas fugit occaecati inventore sed maiores.
- followers : 6781
- following : 1617
linkedin:
- url : https://linkedin.com/in/damariswaelchi
- username : damariswaelchi
- bio : Labore eum dolorem aut architecto a accusamus.
- followers : 2271
- following : 2130
facebook:
- url : https://facebook.com/damariswaelchi
- username : damariswaelchi
- bio : Voluptatem odio consequatur veritatis nemo incidunt hic.
- followers : 1839
- following : 760

