Have you ever dreamed of making your own flour tortillas, the kind that are soft, warm, and just a little bit chewy? Maybe you've tried before and found the dough tricky, or perhaps your tortillas came out stiff. Well, you're not alone, and it's actually quite simple to get them right with a few helpful pointers. This guide is here to show you how to make flour tortillas that will make your meals truly special, perhaps even better than what you get from a store, you know?
Making tortillas at home is a skill that feels really rewarding, and it opens up a whole new world of delicious possibilities for your kitchen. Think about fresh tacos, quesadillas, or even just a warm tortilla with a pat of butter. It's a simple pleasure, and honestly, the taste of homemade is just different, more satisfying, in a way. You'll find that once you get the hang of it, you'll wonder why you ever bought them.
For many folks, making tortillas is a tradition, a way to connect with food on a deeper level. It’s a bit like following a recipe that has been passed down, where each step builds on the last, almost as if the process itself determines the proper order for the best outcome, so to speak. Today, we're going to walk through each part, making sure you feel ready to create your own wonderful tortillas, right?
Table of Contents
- Why Homemade Flour Tortillas?
- Gathering Your Ingredients
- Tools You'll Need
- The Step-by-Step Process
- Troubleshooting Common Issues
- Storing Your Fresh Tortillas
- Creative Ways to Enjoy Your Tortillas
- Frequently Asked Questions About Flour Tortillas
Why Homemade Flour Tortillas?
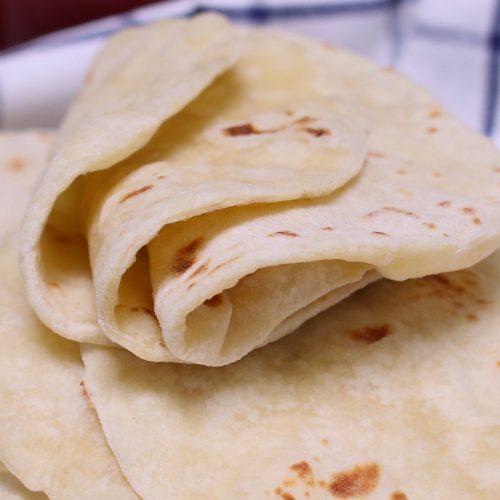
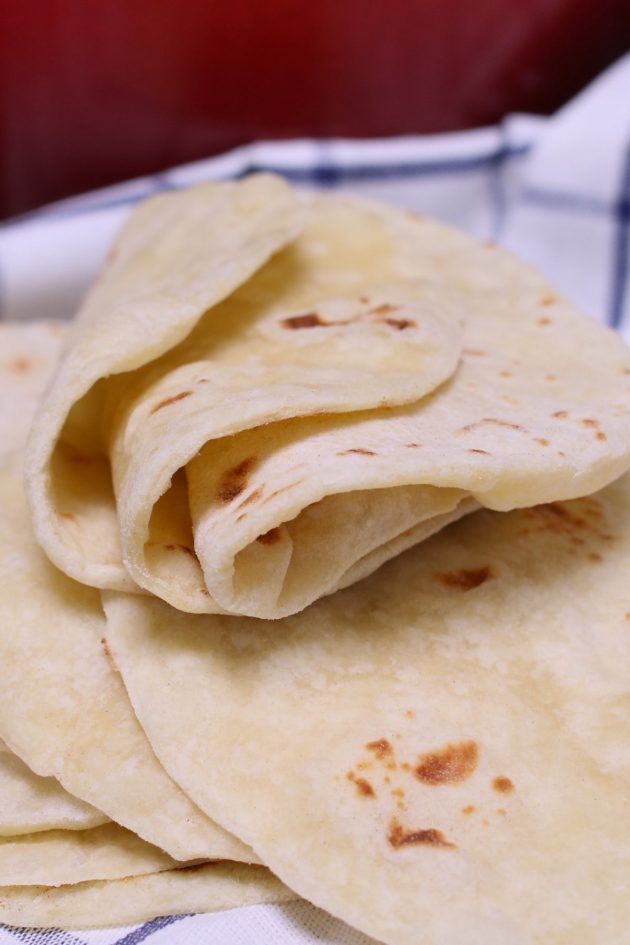
There's something truly special about a warm, fresh tortilla. The smell alone can bring a smile to your face. Store-bought options are fine, yet they often lack that certain tenderness and flavor you get from making them yourself, you know?
Making them at home also gives you complete say over what goes into your food. You pick the ingredients, and you avoid any added things you might not want. It’s a simple way to eat better, and it tastes better, too, honestly.
For many, this process is a connection to cooking traditions. It's a skill that, once learned, becomes almost automatic, like a system that just knows which steps to update based on what the dough needs, as it changes. This is a skill that keeps on giving, so it is.
Gathering Your Ingredients
You don't need a lot of fancy items to make good flour tortillas. Most of these things are probably already in your kitchen. It's a very basic list, actually, which makes starting out simple.
Flour: The Main Player
All-purpose flour is the usual choice for tortillas. It gives a good texture, not too heavy, not too light. Some people like to use bread flour for a bit more chewiness, but that's a personal pick, you know?
The type of flour can affect how much water you need. It's a bit like a variable that changes based on the starting conditions, so you might need to adjust things as you go, which is fine.
Fat: For Tenderness
Shortening, lard, or even butter can be used here. Lard is what many traditional recipes call for, and it gives a really soft, rich tortilla. Shortening works well too, and it’s easy to find, you see.
Some folks use oil, like vegetable oil, but it can make the tortillas a bit less pliable. The fat helps make them tender, so choose one that fits your taste and what you have on hand, more or less.
Water: The Binder
Warm water is key. It helps the fat mix in better and makes the dough easier to work with. Think of it as activating the other ingredients, getting them ready for their job, you know.
The amount of water can vary slightly based on the flour and even the air around you. It’s a bit like a setting that needs to be computed afresh for each batch, based on the current environment. Add it slowly, that’s the trick.
Salt: For Flavor
Just a little bit of salt brings out the flavor of the flour and makes the tortillas taste better. Don't skip it, even if you are trying to cut back on salt. It really does make a difference, you see.
It's a small addition, yet it plays a big part in the overall taste. It’s a basic ingredient, but one that truly belongs in the recipe, you know?
Baking Powder: A Little Lift
Baking powder is optional for some, but many recipes include it for a slight puff and tenderness. It helps the tortillas get those nice air pockets when they cook. It’s just a little helper, that.
It’s not a lot, just a tiny bit, but it helps give them a light texture. It’s like a small instruction that tells the dough to expand a bit, you know?
Tools You'll Need
You don't need a special tortilla press, though they are nice to have. A rolling pin works perfectly fine. You probably have most of these items already, actually.
- A large mixing bowl
- Measuring cups and spoons
- A rolling pin (or a tortilla press)
- A cast-iron skillet or a non-stick griddle
- A clean kitchen towel
These simple tools are all you need to get started. It’s a basic setup, yet it gets the job done well, you see.
The Step-by-Step Process
Making flour tortillas is a series of steps that build on each other. Following them in order helps you get the best results. It's a bit like a process that automatically determines the proper sequence for all its parts to come together, you know?
Mixing the Dough: Getting the Feel Right
First, put your flour, salt, and baking powder into your mixing bowl. Give them a quick stir to combine everything. This makes sure the salt and baking powder are spread evenly, you know.
Next, add your chosen fat. Use your fingers to rub the fat into the dry ingredients. You want the mixture to look like coarse crumbs, like little pebbles. This step is about getting the fat coated by the flour, so it is.
Now, slowly pour in the warm water, a little at a time. Mix it with your hands or a spoon until a shaggy dough forms. It might seem a bit dry at first, but keep mixing, you know.
The dough should come together into a ball. If it feels too dry, add a tiny bit more water. If it’s too wet, sprinkle in a little flour. This is where you adjust the variables, so to speak, based on how the dough feels. It's a bit like a recipe that has pattern rules, and you adapt based on the actual conditions.
Kneading: Building Structure
Once you have a rough ball of dough, turn it out onto a clean, lightly floured surface. Start to knead it. Push the dough away from you with the heel of your hand, then fold it back over. Turn the dough and repeat, you see.
Knead for about 5 to 7 minutes. The dough will become smoother and more elastic. It should feel soft and springy when you poke it. This part helps develop the gluten, which gives tortillas their chewiness, you know.
It's a steady rhythm, this kneading. You are working the dough, making it ready for the next step. This action builds the structure, and it really does make a difference, honestly.
Resting: The Secret to Softness
After kneading, form the dough into a ball and place it back in the bowl. Cover the bowl with a clean kitchen towel or plastic wrap. Let the dough rest for at least 30 minutes, or even up to an hour, you know.
This rest time is very important. It allows the gluten to relax, making the dough much easier to roll out. It also helps the tortillas become softer and more tender when cooked. It’s a simple step, yet it pays off big time, you see.
Think of it as the dough automatically adjusting itself during this quiet period. It's like a system that just needs time to settle and get ready for its next job, you know?
Dividing and Shaping: Making Your Discs
Once rested, divide the dough into equal pieces. For standard-sized tortillas, aim for about 12 to 16 pieces, depending on how big you want them. Roll each piece into a smooth ball, you know.
Keep the dough balls covered with the towel while you work, so they don't dry out. Now, take one ball and place it on a lightly floured surface. Use your rolling pin to roll it into a thin circle, about 6 to 8 inches across, you see.
Try to roll from the center outwards, turning the dough often to keep it round. Don't worry if they aren't perfectly round at first; practice makes them better. This is where you are forming the final shape, you know.
Cooking: The Hot Pan Method
Heat your cast-iron skillet or griddle over medium-high heat. You want it hot, but not smoking. No oil is needed for the pan, usually, you know.
Place one rolled tortilla onto the hot, dry pan. Cook for about 30 seconds to 1 minute, until you see bubbles forming on the surface and light brown spots underneath. It's a quick cook, this.
Flip the tortilla over and cook for another 30 seconds to 1 minute on the second side. It should puff up a bit, and get more brown spots. This puffing means it’s cooking through and getting that nice texture, you see.
Once cooked, remove the tortilla from the pan and place it in a tortilla warmer or wrap it in a clean kitchen towel. This keeps them warm and soft while you cook the rest. It’s a bit like a careful instruction that keeps them just right, you know?
Troubleshooting Common Issues
Sometimes things don't go exactly as planned, and that's okay. Cooking is like that, you know. Here are some common problems and how to sort them out.
My Dough is Sticky!
If your dough is sticking to your hands and the counter, it likely has too much water. Add a small amount of flour, a tablespoon at a time, and knead it in until the dough feels less sticky and more manageable. This is a common adjustment, you see.
Remember, the humidity in the air can affect how much flour is needed. It’s a bit like an environmental variable that changes how the dough behaves, so you adapt, you know.
My Tortillas are Stiff!
Stiff tortillas can happen for a few reasons. You might have added too much flour, or not enough fat, or not kneaded the dough enough. They might also be overcooked, you see.
Make sure your dough is soft and pliable before resting. Don't add too much extra flour when rolling. Also, cook them just until they get those brown spots, then take them off the heat. Less cooking time often means a softer tortilla, you know.
The resting time is also very important for softness. Don't skip it, or cut it short. It’s a crucial step that helps the dough become what it needs to be, you see.
They Aren't Puffing Up!
Puffing is a sign of a well-made tortilla, but not all of them will puff, and that's fine. If they aren't puffing, your pan might not be hot enough, or the dough might be rolled too thick, you know.
Make sure your pan is hot enough before putting the tortilla on. Also, try to roll your tortillas as thin as you can without tearing them. The thinner they are, the more likely they are to puff, you see.
Sometimes, just pressing gently on the edges with a spatula can help encourage them to puff. It's like giving them a little nudge to do what they are supposed to do, you know.
Storing Your Fresh Tortillas
Homemade tortillas taste best fresh, but you can keep them for a few days. Once they cool, put them in an airtight bag or container. They can stay on the counter for a couple of days, you see.
For longer keeping, put them in the fridge for up to a week. You can also freeze them for a month or more. Just make sure to put parchment paper between them so they don't stick, you know.
To warm them up, you can use a dry skillet, microwave, or even a damp paper towel in the microwave. They warm up quickly, and they taste almost as good as fresh, you know.
Creative Ways to Enjoy Your Tortillas
Now that you know how to make flour tortillas, the possibilities for enjoying them are vast. They are so much more than just a wrap for fillings, you see.
- Classic tacos or burritos, of course!
- Quesadillas with your favorite cheese and fillings.
- Homemade chips: cut them into wedges, bake or fry until crispy.
- Breakfast burritos with eggs, beans, and salsa.
- Cinnamon sugar crisps: brush with butter, sprinkle with cinnamon sugar, bake until crisp.
- Use them as a base for mini pizzas.
- Make enchiladas or flautas.
The soft texture of homemade tortillas makes them perfect for so many dishes. They really do make any meal feel more special, you know. Learn more about Mexican cuisine on our site, and link to this page for great tortilla filling ideas.
Frequently Asked Questions About Flour Tortillas
<Related Resources:

Detail Author:
- Name : Destinee Crona
- Username : grau
- Email : hmorar@johns.com
- Birthdate : 2004-02-07
- Address : 53955 Kris Stravenue Apt. 655 West Russel, NC 86532
- Phone : +1-865-831-1698
- Company : Hackett, Mills and Hintz
- Job : Soldering Machine Setter
- Bio : Natus recusandae asperiores perferendis. Consequuntur sed ratione dolores pariatur animi dolore. Quo illum at totam id unde dolorum porro.
Socials
tiktok:
- url : https://tiktok.com/@kris860
- username : kris860
- bio : Odio eos dolor suscipit iusto aspernatur iusto ipsum. Quod non quod eius.
- followers : 6889
- following : 1225
facebook:
- url : https://facebook.com/larkink
- username : larkink
- bio : Perferendis ut debitis quis eius voluptatem voluptatem sed saepe.
- followers : 5714
- following : 1201
